
London Pride 38L Brewing Journal
Started 21st March 2013
This is the second time that I will be using this recipe as it turned out fantastic last time. It is not as strong as my last brew but I think that I prefer beer around the 4.5 - 5.0 ABV mark. Once it gets stronger than this, the alcohol tends to overpower the more subtle flavours that I enjoy.
Since starting water treatment I have been concerned about the amount of CRS that I have been using. For this brew I have purchased an aquarium water alkalinity test kit, to get a more accurate figure on which to base the treatment. Initial tests on my water show that the CaC03 levels are quite a bit lower than the Anglian published average readings. This means that I have been overdosing my water with CRS, so I need to correct this for future brews.
I still have a couple of vials of WLP002 yeast, which was harvested from a previous brew. These have been in the fridge for a few months now, so I am not sure how viable they are. To ensure that I get a good start to Fermentation, I will use some DME and create a starter.
For this brew I have ordered Thomas Fawcett Malt. This is not necessarily better than Crisp but I have had some good results with Thomas Fawcett in the past. It will be interesting to see the results as the Thomas Fawcett Malt is 25% more expensive.
Another technique that I will be using for this brew is First Wort Hopping (FWH). The 16g of Goldings that would normally be put in at the end of the boil will be split into 2 batches. The first batch (30%ish) will be added to the boiler before the first running of wort are added. This should give about an hour of steeping at lower temperatures before the boil is reached.
This will be 38L batch, filling 2 Corny Kegs and was planned using Beer Engine.
Recipe:
Ingredients:

| Recipe | Measure |
|---|---|
| Brew Length | 38L |
| Pale Malt (EBC 4 or less) | 6195g |
| Crystal Malt | 619g |
| Challenger Hops (Start of Boil) | 11g |
| Northdown Hops (Start of Boil) | 13g |
| Target Hops (Start of Boil) | 19g |
| Goldings Hops (Last 10 Min) | 16g |
| Yeast (Using Starter) | WLP002 |
| Mash Liquor | 17 Litres |
| Strike Heat | 72C |
| Mash Temperature | 66C |
| Mash Time | 1 Hour 30 Minutes |
| Sparge Temperature | 77C |
| Mash Efficiency (estimated) | 75% |
| Boil Time | 1 Hour 30 Minutes |
| Fermentation Temperature | 20C |
| Expected OG | 1040 |
| Actual OG | 1042 |
| Expected FG | 1010 |
| Actual FG |
Water Treatment:
| Recipe | Measure |
|---|---|
| CaCo3 Adjustments | |
| Calcium Carbonate CAC03 (Anglian avg 333ppm) Measured using Salifert | 211 ppm |
| Calcium Carbonate Required | 30 ppm |
| Adjustment Necessary | 181 ppm |
| CRS per Litre Required (Brupacks) | 1 ml/L |
| Total CRS to add to Mash (17L) | 17 ml |
| Total CRS to add to Sparge- Can Only got 28L in HLT | 28 ml |
| Chlorine Treatment | |
| Campden Tablets (half in mash, half in sparge) |
1 tablet |
| Calcium Adjustment (using brupaks calculation) | |
| Calcium in Water | 133.2 ppm |
| Calcium Required | 180 ppm |
| Adjustment | 53 ppm |
| DLS (using GW Calc it suggests adding none) | None Added |
New Equipment/Ingredients used:
- Liquid Yeast - WLP002 - First time making a starter using DME.
- Star San - Finally got around to purchasing some Star san for sterilising duties. I will probably continue to use IO Star for my Kegs, as this works well but for general equipment hygiene Star san is easier and safer to use.
Yeast Starter:

Day 1
This old Demijohn was rescued from the garage and is being used as a starter bottle. This will easily hold 2L and can be fitted with an airlock.
2 cups of light DME and 2L of water were boiled for around 10 minutes. The SG was around 1030, which was a bit lower than intended but I do have 2L of starter so this should work OK.
The starter looks a bit Murky at the moment so I will wait until brew day before deciding if I use this or my trusty standby S-04
As this is my first time making a starter with this yeast, I am not really sure what to expect.

Day 2
My starter has taken well over 24 hours to start showing any signs of activity. When first made up it looked like the yeast was active but then it went completely still and I was wondering if I should throw it.
The temperature was a little low so the heat tray has been used to raise this. There is now some signs of yeast activity but still very little. When I last re-used this yeast I just re-pitched without a starter and it went off like a rocket but this time the yeast has been in the fridge for 3 months+, so it is taking a little more TLC to get it going.
2 days after the yeast was pitched in the starter it is now definitely fermenting
Preparation:
The night before brewing I have weighed my grain and measured out the correct amount of water for the mash (17L). The Water was also tested using a Salifert test kit, which gave a reading of 211ppm
Half a campden tablet and 17ml of CRS were added to the mash liquor and stirred well. This is now ready for an early start in the morning.


Mashing:
- 08:00 - Switched on HLT to heat Mash water (liquor) to 78C.
- Filled Mash tun with warm water to heat it ready for Mash Liquor.
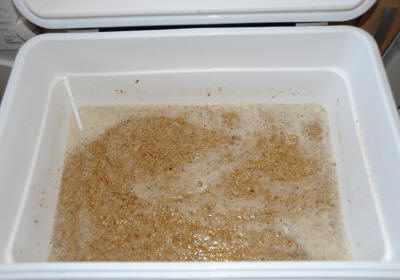
- 09:00 - Transferred water into the Mash Tun and closed lid for 10 minutes for temperature to stabalise.
- After 10 minutes the temperature was 72C so doughed in.
- Grain was given a good stir and then the lid shut with thermometer in place.
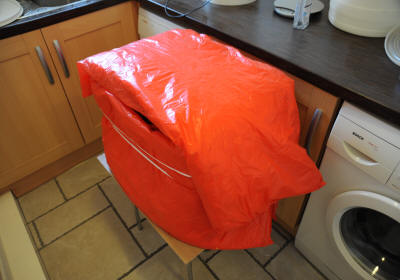
- Temperature settled at almost exactly 67C. At this point the lid was sealed properly and some extra insulation added to the mash tun.
- The HLT was refilled with sparge water and switched on to ensure sparge water was ready. Temperature was set to 86C, which allows for some cooling as the water runs through the sparge arm.
- Sparge water was also treated with half a campden tablet and 28 ml of CRS.
- 30 minutes into Mash the temperature was checked again , it has now settled to 66/67C, which is perfect so I will not open Tun again.
- At 1h 30 min the temperature was 64/65c, which is fine.
- Sparge water was ready to go, so on to sparging

Sparging
- Firstly, remember that we want to FWH, so some hops should be measured and added to the boiler prior to any runnings being added. See boiling below for details.
- Sparging should be done at around 77c but by the time my sparge water hits the grain it will have lost some temperature. I am aiming to keep the sparge water at 86C to take account of this. The thermometer in the grain still shows temperatures around 67C, even with the sparge water set to 86C.
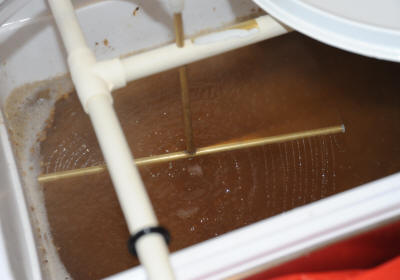
- I will be using the fly mashing method using my "Phils Rotating Sparger"
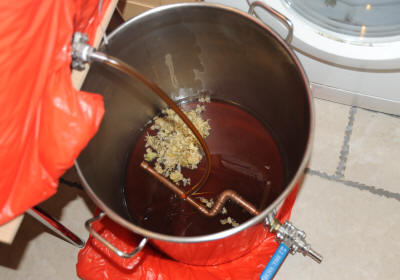
- Sparge water was heated to 86C in HLT using temperature controller to maintain the temperature at 86C. I am using a 3 tier set-up with sparge water at the top, then mash tun, then boiler at the bottom.
- The Wort will be collected in batches as the full 40L+ is too heavy to move. The batches will be transported into the garage where my boiler is waiting.
- The first 2 litres of run off were returned to the mash tun as they contained trub.
- I started the collection straight into my main boiler until just before it was too heavy to move. The wort was then taken out to the garage and the gas ring turned on to full.
- A wine fermenter was used to continue collecting wort from the sparge process. Small batches were transferred to the boiler in the garage to ensure they did not cool.
- Run off into the collection bins was balanced with sparge water until the sparge water ran out. I then slowly let the mash tun empty.
- As my HLT is not big enough I had to top up with about 5 kettles of water during the process.
- The final runnings were around 1010, which is OK.
- Sparging took 1 hour 15 minutes.
Boiling


- FWH - 6g of Goldings hops have been measured and put into the boiler prior to any wort being added from the sparge.
- The boiler was full to within about 1" of the rim. This is as far as I dare go in case of a boil over.
- It has taken over 1 hour to come to the boil as it is very cold outside today (0C Brrrrr!). I fitted the lid as this seems to speed this process up.
- Once boiling started the lid was removed and the first batch of hops added.
- Timer set for 1 hour 30 minutes. Using the gas gives much more control and allows me to set the rolling boil without overcooking it.
- Due to the cold, I kept the butane cylinder indoors overnight but it chilled rapidly in the garage and is now getting too cold. I have to keep shaking the gas cylinder to ensure a good flame. I do not have a lot of gas left and was not able to find any yesterday, so may end up having to cut the boil short. As long as I get a good hour of boiling it will be OK.
- While I was waiting for the boil, I emptied and washed out the the mash tun.
- After about 25 minutes the volume in the boiler had already dropped, so I started to slowly add the extra wort. This then got at least 1 hour of boiling. My 50L boiler is just a bit tight for a 38L batch.
- The outside temperature was so cold that keeping a rolling boil has proved a challenge. The Butane constantly needs shaking to get a decent flame. I have ended up connecting my heating belt to the cylinder to try and warm it up (this is not a good idea I am sure). For future brews i will ad some insulaton.
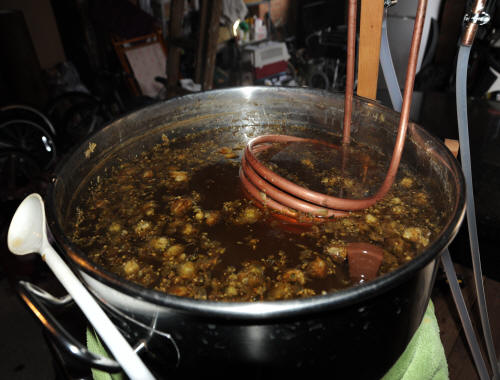
- Nearing the last 15 minutes, so I have put the Wort chiller into the boiling wort. This ensures that it is fully sterlilised.
- The second batch of hops was added for last 10 minutes together with the protofloc tablet.
- After the full 1 hour 30 minutes the boiler was switched off and started cooler. Lucky for me, the gas held out with some to spare.
- Measured SG and got a reading of 10.5 Brix (SG 1042). This is perfect.
Cooling
- Connected up the garden hose pipe to the wort chiller and started the cooling process. Garden tap was frozen so I had to encourage it with some warm water. Got it running in the end though.
- Used some wood to prop up the chiller so it sits at the top of the wort, just below the surface. This makes cooling more efficient.
- At 80C I chucked in a handful of Goldings hops and switched off cooler for 15 minutes to steep. Maybe I should have measured these but it will be OK.
- Cooling water was then turned back on to cool to pitching temperature.
- Cooling took around 40 minutes.
- The cold break was now visible and the wort looked crystal clear with clumps of trub forming.
- As the tap water was so cold, cooling was very quick. I stopped at around 25C as it was so cold outside the temperature would drop further during the run off from the boiler.
- I had to go out for 30 minutes to run an errand, so the lid was put on the boiler and it was left alone to settle.

Draining/Aeration:
- The first runnings were remarkably clear, so much so that I did not bother returning them to the boiler.
- Collection started into a 5 gallon wine fermenter.
- The wort was extremely clear and the colour is perfect for London Pride.
- In order to be able to move 40L of wort I used 2 wine fermenters to collect the run off. These are then only 20L each and can easily be moved back inside the house.
- The hop filter did its job well but there was at least a liter of wastage. This was despite using a tube on the tap to ensure a siphon sucking out from the bottom. On inspection the hop filter may not have been tight enough, so the siphon effect was not perfect.
- During the draining, the wort also got a good aeration.
- The 50L boiling pot was then cleaned and re-sterilised ready for use as a fermenter. This was set up on a heat pad with the temperature controller managing the heating. I have put the probe straight into the pot as this is now my new stainless steel 200mm version.
- The two wine fermenters were then emptied into the 50L stainless steel pot giving a good aeration.
- Temperature was 21.7C and ready for yeast pitching.
Fermentation:
- The yeast starter had been left in a cool place all day to try and encourage the yeast to flocculate but there was not much settled on the bottom. I tried to pour some of the excess starter liquid off the yeast but the yeast was not set and immediately started dissolving. I gave up and just pitched the whole thing. Before pitching, I did also taste the starter to ensure there was no infection, it was fine.
- I am not sure that it was a great idea to pitch the whole starter as the DME may leave some "off" flavours in the beer. Read the "tasting notes" section to see the results.
- 24/03/13 18:15 - Yeast pitched, temperature 21.4C.
- 25/03/13 08:00 - Fermentation has started well and a rocky Krausen has formed. Temperature is 19.9C

Using a starter seems to have ensured that fermentation established itself quickly. Without a starter we would only just start to see some bubbles by this time. In the picture to the left you can see that the fermentation is well established by the rocky Krausen foam, which is 1-2" thick.
Some trub has been thrown up by the Krausen but this is normal and nothing to worry about.
- 24/03/13 - 16:00 - The rocky Krausen has already started to settle back down to a fairly flathead on the wort, it is now only about 2/3" thick. The initial few hours of fermentation must have really gone off like a rocket. Temperature is still stable at 20C.
- 24/03/13 - 22:00 - Temperature is still stable at 20C. Krausen is a flat layer of foam.
- 25/03/13 - 07:00 - The temperature has dropped to 19.8C and the Krausen has now fallen back into the wort, with just a fine layer of bubbles remaining. Fermentation is obviously beginning to slow down, so i will take an SG reading later today.
- 25/03/13 - 16:00 - Now the wort is almost completely flat (no head) but visibly has many rising bubbles. The Brix reading was about 5.5, which calculates back to an SG of 1011, so fermentation is almost complete.
- 27/03/13 - 16:00 - Still fermenting. Strangely a shallow head has re-appeared on the surface of the wort. Brix reading is now 5.0 which would equate to 1007 with the Calculator that I am using. I have tried another calculation by Sean Terrill that seems to work better on this brew. Using this calculation the SG is 1009.5.
- 29/03/13 - Still seems to be some slow activity. Quite an apple smell but seems to taste OK. As I was having some issues with the Brix conversion, I have tested the SG using my old hydrometer, which read 1009.
- 30/03/13 - I have disconnected the heat tray from the STC1000 and taken the temperature probe out of the wort so that the stainless steel pot lid can be fully closed. The lid does not close airtight but as long as it is not opened a layer of co2 will protect the beer.
- 31/03/13 - I have sat the temperature probe on top of the lid which will only give a rough idea of the temperature of the beer. This was reading around 17.5C this morning. I would like to get this lower if possible as it will encourage the yeast to flocculate. The plan is now to leave the beer alone for 1 week. This will ensure that there has been enough time for the diaceytl rest period and hopefully enough time to clear. If the beer is still very cloudy at this time I will consider using some gelatin so I can get it safely into sterile kegs.
- 04/04/13 - Decided this morning that I do not want the beer in my SS Pot any longer. The lid is reasonably well fitting to stop things getting in but is far from airtight. The plan was to either transfer to 2 wine fermenters and leave under airlock for a further week or Keg. As the beer already looked reasonably clear, I decided to Keg.
Clearing:
- Nothing special done for clearing. Using a high flocculating yeast usually means that this is not an issue. However I am not sure that I left the beer long enough before kegging so we will wait and see now.
Kegging:
- 2 Corny Kegs were cleaned with Oxyclean and then Iodophor to sterilise. Although the Iodophor is "no rinse", I usually rinse out with some clean boiled water to be safe.
- I also had some Star San mixed in a spray bottle, so everything got a good spray as I was sterilising, Lids & posts included.
- The batch size was perfect and filled 2 Cornies + 1 bottle.
- The yeast slurry left behind was not what I would have expected from WLP002 as it is usually fairly compact. This stuff was like the yeast in my starter and was mixing back into the beer as I gently tilted my fermenter. I am not sure what happened here as the beer tastes OK but the yeast has definitely mutated.
- The Lid O rings were smeared with vaseline to ensure a good seal.
- Kegs were pressurised to 20Psi and purged 4 times to ensure that all oxygen was removed.
- The Kegs will now be left at 20Psi (no shaking) for around 1 week and will then be put out in the garage for conditioning. The length of conditioning time that the beer gets will depend on how quickly I run out of beer, as I am on my last Keg now.
- 11/04/13 - The kegs are still taking some gas but very little now. After the weekend, one will be moved to the garage for conditioning and the other will probably be hooked up ready for drinking as my last full keg of ESB is nearly dry.
- 12/04/13 - The +1 bottle is being used as an indicator of how clear the beer is. Today the bottle is crystal clear, which means that the kegs should also be well on their way to clearing. I think the Kegs may take slightly longer but not much. It always seems that as soon as you start to see the beer clearing it goes from cloudy to completely clear in a couple of days. The concerns that I have with the WLP002 yeast possible mutating are not so great now as it has obviously managed to flocculate fairly well. This is the firs time that I have tried to keep the beer in my SS pot as long as possible. I usually rack the beer into two wine fermenters under airlock for an extra week clearing before kegging. It will be interesting to see if the Corny Kegs can cope with some extra sediment. I am sure that the first few pints will be very murky.
Tasting Notes:
During Kegging I have tasted the beer to ensure that it is OK and it definitely tastes like beer. There is quite a strong hop flavour, which will mellow with conditioning and a nice malty taste. Its not too dry , given the yeast issues, so I am expecting this to turn out well.
After around 4 weeks in the Keg the beer is now completely clear and I am drinking it. The colour is about right for London Pride, so I am happy with this. This brew is not as tasty and my previous attempts using this recipe but I think this is due to the lower FG, which means less residual sweetness.
The hop flavour is excellent and much more pronounced that the previous brew. I am not sure whether this was due to the FWH technique or the lack of residual sugars. Although this beer did not turn out as well as my last London Pride attempt, It is still very drinkable. Yes, it is dryer than planned but there are no "off" tastes, so just a different variant of a good beer.
Contacts
Visit us on Facebook or Email